
Organizing a successful tournament requires meticulous planning and attention to detail. One crucial step that every tournament director (TD) must master is verifying events using the Live Console. This process ensures that all events are finalized and ready for tournament day, avoiding last-minute surprises and disruptions. In this comprehensive guide, we will walk you through the entire verification process for different event types, including round robin, double round robin, multi-pool formats, and elimination brackets. By the end, you'll be equipped with the knowledge to confidently verify your events and streamline your tournament operations.
Introduction to Verifying Events with Live Console
Verifying events in the Live Console is a mandatory step that takes place after registration closes. Once this window shuts, the system pulls all the information from each event setup, allowing you to review and finalize details. Before starting verification, it’s recommended to use the tournament simulator to create your optimal schedule and update live events with any changes to start times. While not strictly required, this preparation makes the verification process smoother and helps prevent overbooking your tournament.
If you haven’t used the simulator yet, it’s a good idea to familiarize yourself with it beforehand. The simulator is a powerful tool that can optimize scheduling and minimize conflicts. For those new to the simulator, training videos are available on our YouTube channel.
Step 1: Accessing and Starting the Verification Process
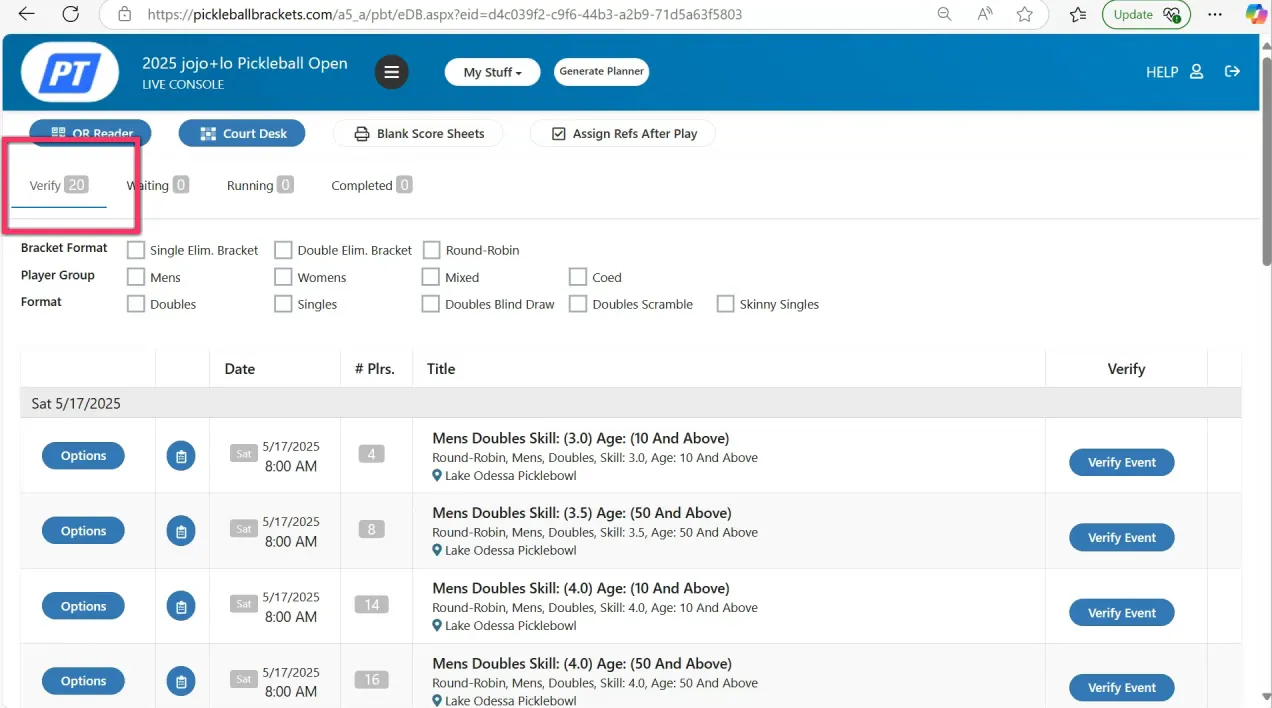
Once you’re ready, navigate to your Live Console where you’ll see all your events waiting to be verified. You don’t need to verify events in any particular order, but every event must eventually be verified before the tournament day.
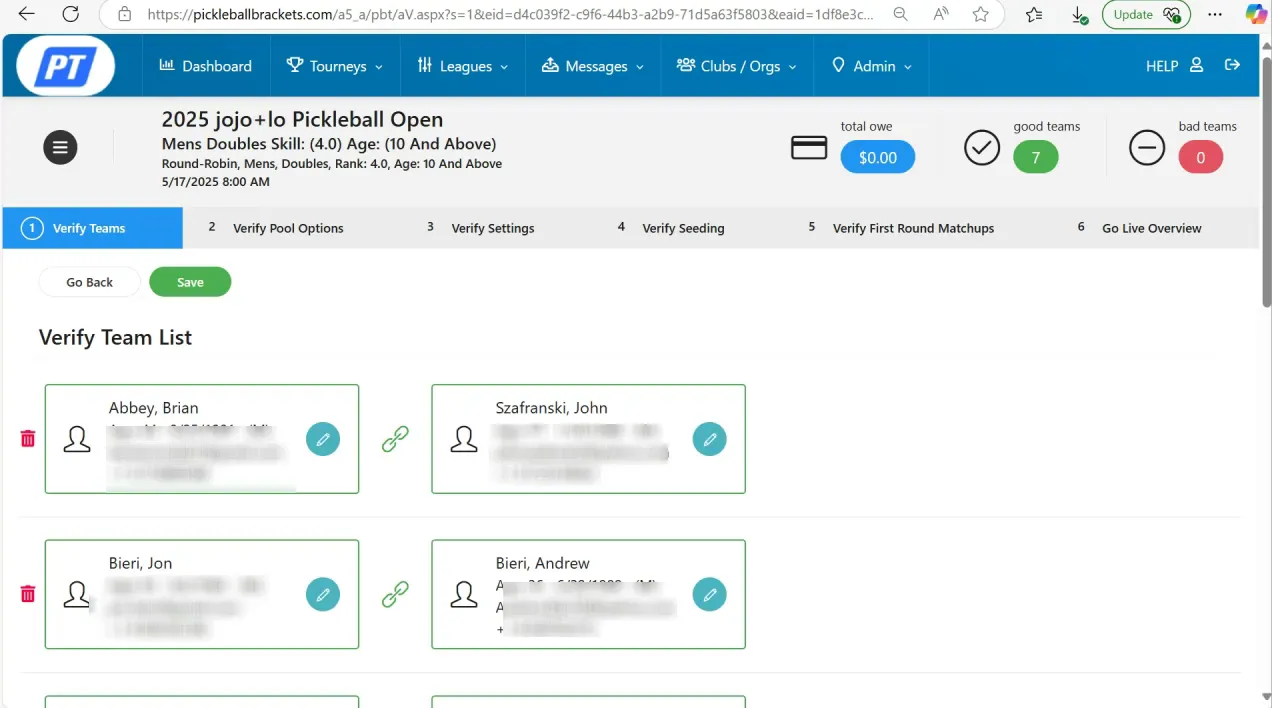
Click on “Verify Event” for any event to begin. The first screen you’ll encounter displays all the teams registered within that event. Here, you can scroll through and check that every participant has a partner and has completed payment. Teams without partners will automatically be excluded and withdrawn from the event to maintain fairness and organization.
After confirming team status, click Save to proceed. A confirmation box will appear asking if you want to continue. Review the number of teams and any exclusions, then hit Continue if everything looks correct.
Step 2: Verifying Event Format and Structure
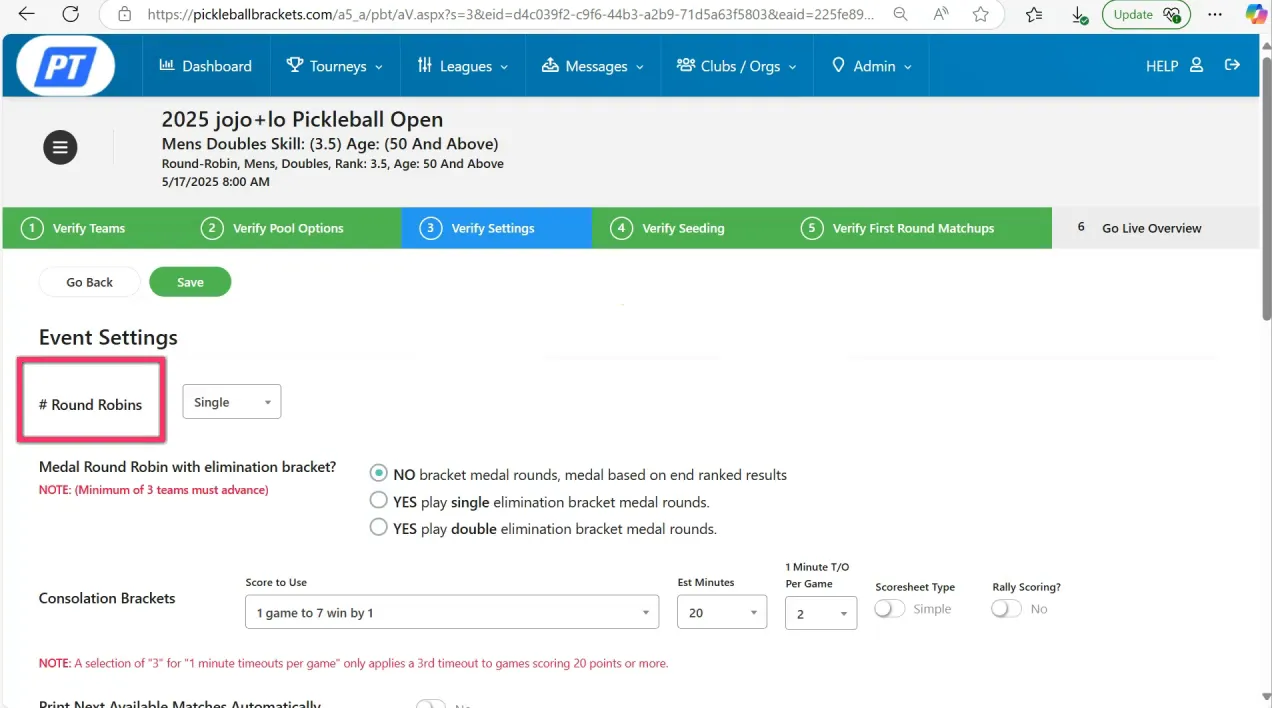
The next step is to verify the event format. This is where you confirm whether the event is a round robin, double round robin, split into pools, or an elimination bracket. For example, a round robin event with seven teams might not be split into pools, so the setup you initially created may already be correct.
Click Save and Continue once you confirm the format.
Next, verify the number of round robins you plan to play:
- Single round robin: Each team plays every other team once.
- Double round robin: Each team plays every other team twice.
- And so on, depending on your tournament rules.
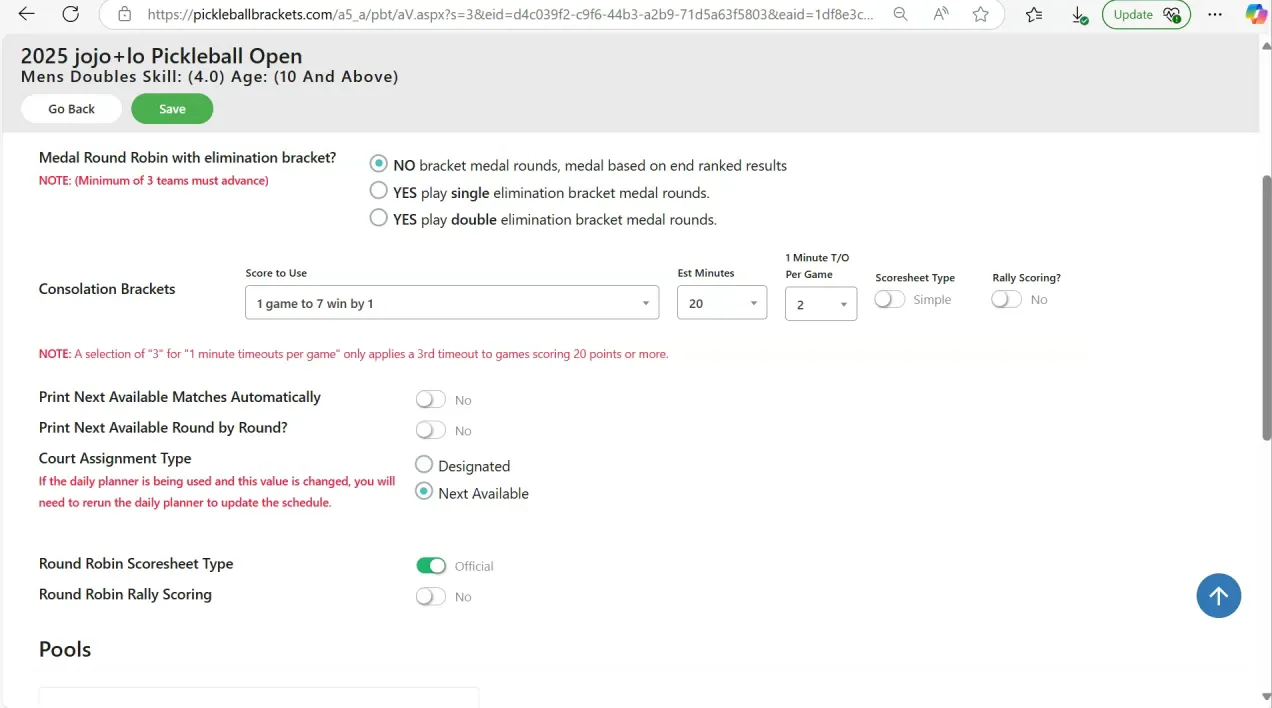
If your event includes an elimination bracket following the round robin, indicate this here. You can also specify if consolation brackets will be played. If not, you can skip any consolation setup.
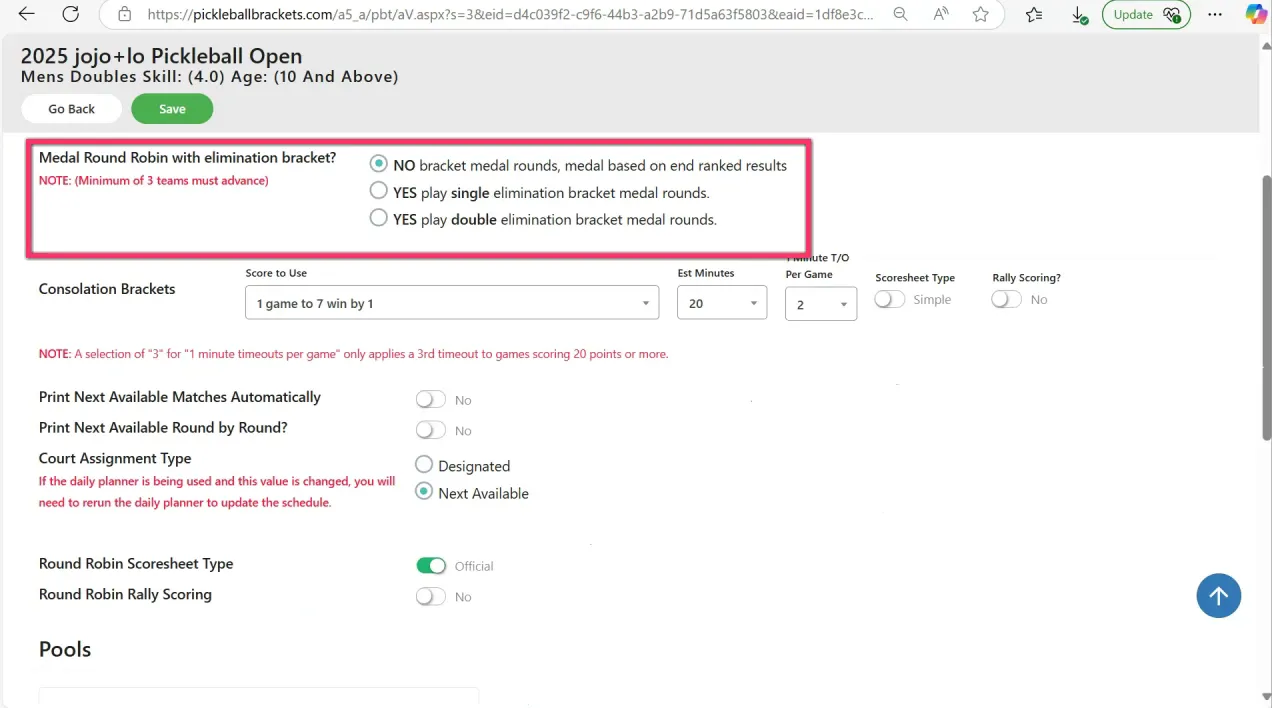
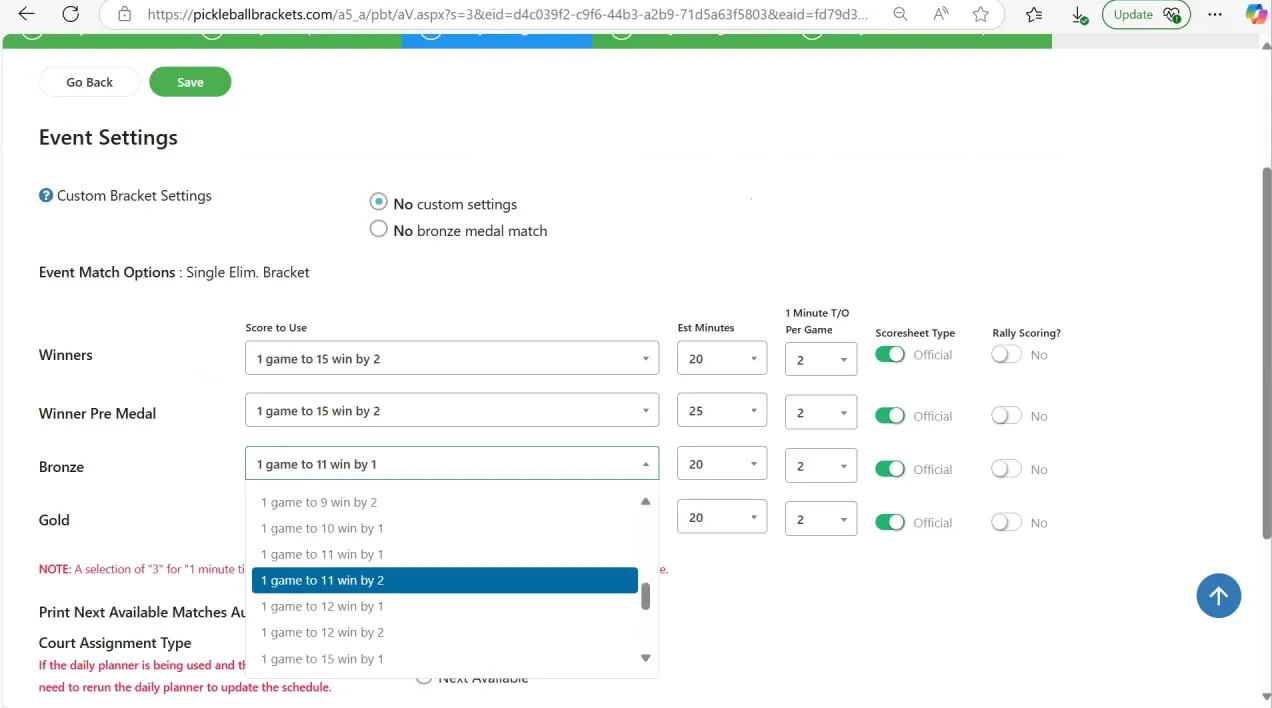
Configuring Printing and Court Assignments
Make sure to turn on printing if you plan to use physical score sheets during the tournament. Decide whether you’ll assign designated courts or use the next available courts method. You can also choose between simple or official score sheets depending on your preferences or tournament standards.
At the bottom of this setup page, configure how you want the bracket to play out. This includes setting match parameters such as:
- Match length (e.g., one match to 15 points)
- Win conditions (e.g., win by two points)
- Estimated match duration (e.g., 25 minutes per match)
These settings depend on your available time and space, so tailor them to fit your tournament’s unique needs.
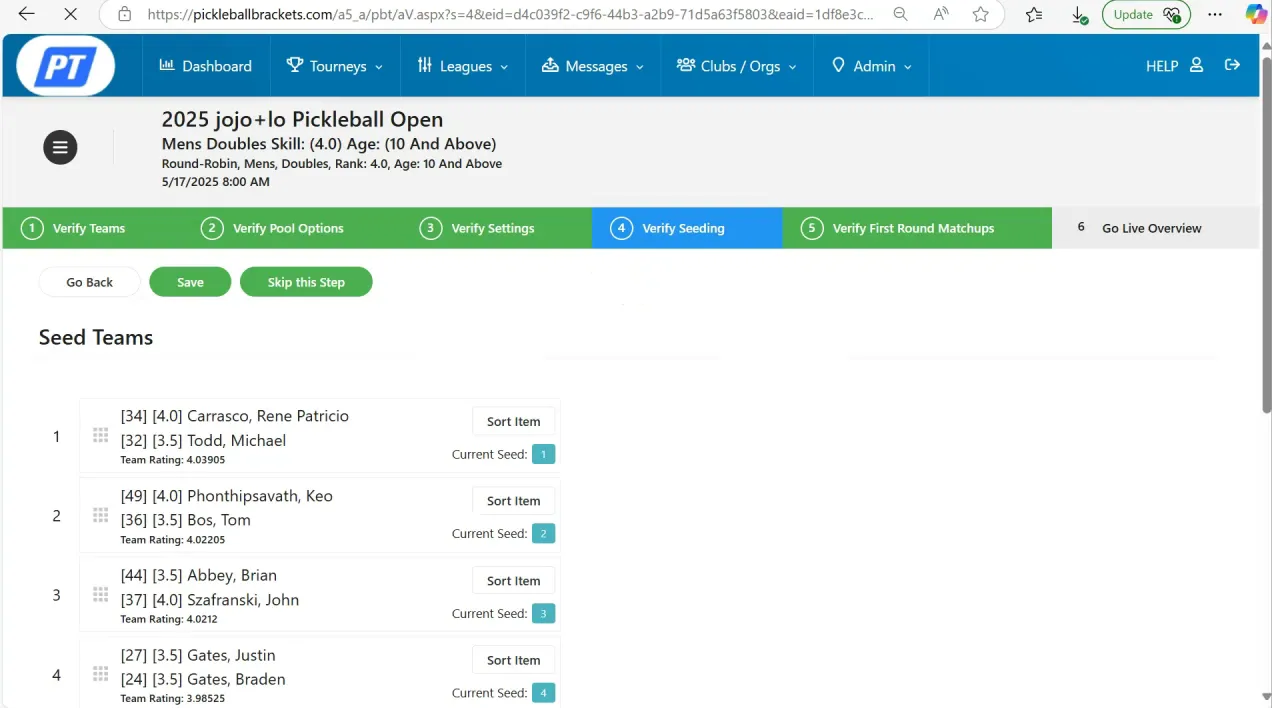
Step 3: Reviewing Seating and First Round Matchups
After verifying the format and match details, you’ll move on to seating arrangements. You can drag and drop teams to change seatings, but it’s usually best to skip this step because seating is typically determined by player ratings. Manual adjustments are only recommended if you’re using self-rating systems where players have similar ratings.
Next, review the first round matchups. Again, if something stands out as unusual, you have the option to adjust seating, but otherwise, it’s advisable to save or skip and continue.
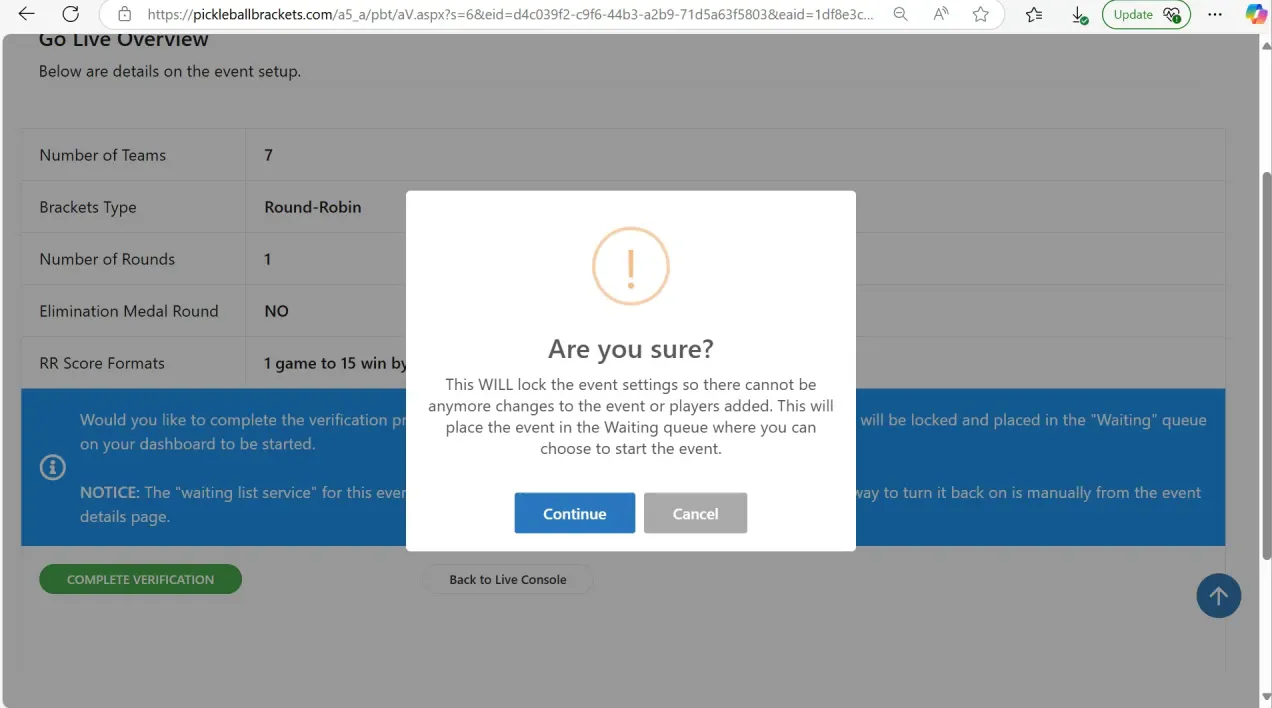
Step 4: Completing Verification and Moving Events to Waiting
Once all previous steps are reviewed and confirmed, you’ll see a final overview of the bracket setup. Take this opportunity to double-check everything before clicking Complete Verification at the bottom of the screen.
After completion, your event status will change to waiting, indicating it is ready and set to start on tournament day. You can view these waiting events anytime in the Live Console.
Verifying Different Event Types
Double Round Robin Events
Verifying a double round robin event follows the same initial steps as a single round robin. When you reach the round robin setup, use the dropdown menu to select Double round robin.
After that, quickly set up your format, printing options, court assignments, and match parameters. Skip seating adjustments if unnecessary, and complete the validation process. Your double round robin event will now be ready and waiting.
Multi-Pool Events
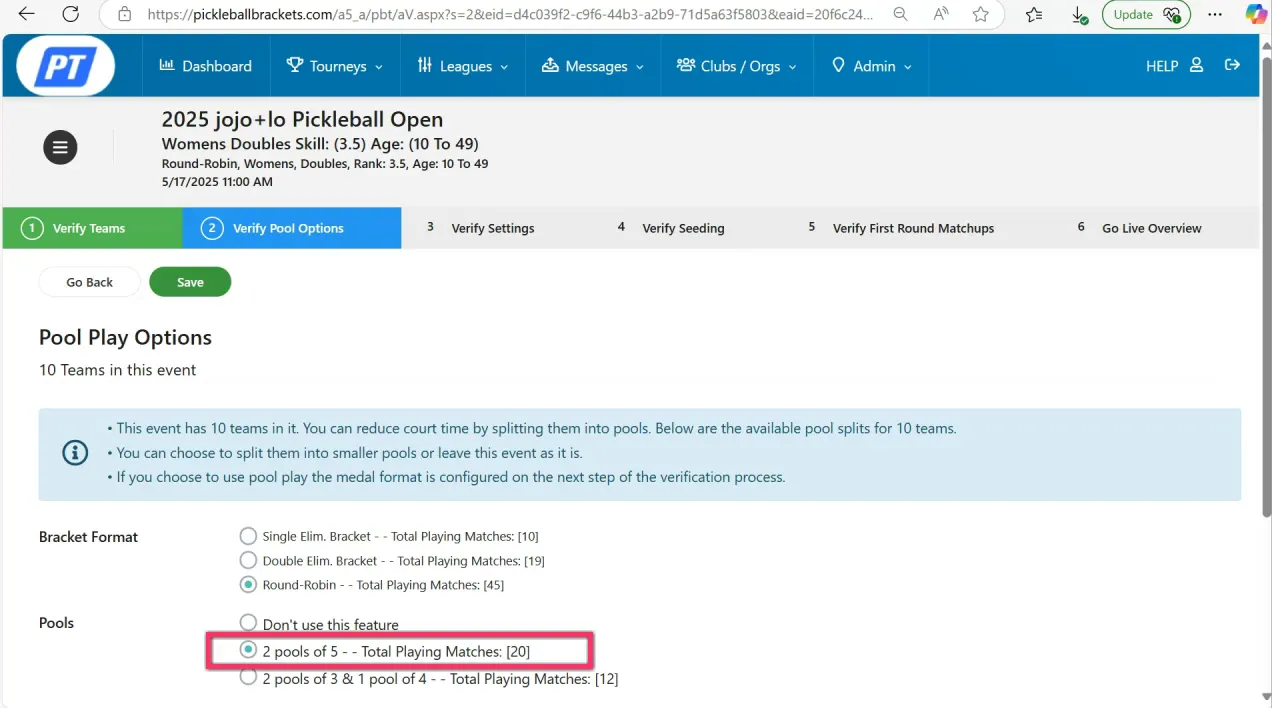
For larger events, you might use multiple pools. In this case, verify the pool setup carefully. For example, if your event has 10 teams, you might split them into two pools of five teams each. The pool options will automatically adjust based on the number of teams.
Decide if you want to run an elimination tournament after pool play, and adjust medal options accordingly. Make sure the medal playing format and time estimates are accurate.
Don’t forget to configure printing and court setup options here as well.
You can also control how many teams from each pool advance to the playoff bracket. The most common setting is to allow two teams per pool to move forward, but if time allows, you can let all teams advance.
Verify the round robin format for pool play, save, and continue. Adjust seating only if needed before completing the verification.
Double and Single Elimination Brackets
Elimination brackets are simpler to verify. Choose whether your event is single or double elimination. For double elimination, ensure you have the correct playing format set for both winners and losers brackets.
Single elimination verification is straightforward with minimal setup required. Once verified, the event will be ready for tournament day.
Tips for a Smooth Verification Process
- Use the Simulator First: Before verifying events, run your tournament schedule through the simulator. This helps identify conflicts and optimize start times.
- Check Partner and Payment Status: Teams missing partners or unpaid fees will be excluded. Ensure your registrations are complete before verification.
- Be Consistent with Formats: Double-check that your round robin, pool, and elimination formats match your tournament rules.
- Keep Printing and Court Setup in Mind: Decide early if you want printed score sheets and how courts will be assigned to avoid confusion on the event day.
- Limit Manual Seating Changes: Trust player ratings for seating unless you have a good reason to adjust manually.
Conclusion
Verifying events with Live Console is an essential step to ensure your tournament runs smoothly and efficiently. Whether you’re managing a simple round robin or a complex multi-pool elimination event, following these verification steps will help you finalize your event details with confidence. Remember, the key to successful verification lies in preparation—using the simulator, confirming registrations, and reviewing all settings carefully.
By mastering the verification process, you’ll reduce stress on tournament day and provide a better experience for players and staff alike. For further training and to explore other Live Console features, be sure to visit our YouTube channel and continue building your tournament management skills.


